Sunday, May 17, 2015

More Plastic Bottle Craziness


After making a few Plastic Bottle Planters, I still had plenty of bottles left so I thought, "why not try a wreath" and see what happens. Still not sure if I like it or not, but I'm hoping as it fills in it'll "grow" on me.

Here's a brief look at how I did it:

 I had a few of these grapevine wreaths laying around so that's what I'm using for my base. You'll also need your plastic bottles and some zip ties. Any wreath form will do.


I used a hole punch to make holes in my bottles and zip ties to hold it to the frame base.

I haphazardly placed them around the wreath. Three on the top and three around the bottom. The sides are tricky. I'm betting using a drill might have worked better for putting in the holes, giving me a little more versatility for where they had to go. You're a little limited by the length of the hole punch.

I found a spot to hang the wreath in order to plant it. Simply fill your bottles partially full with potting soil and start adding flowers. I used purple potato vine, yellow petunias, purple/white striated petunias and white alyssum. Here it is ready to be planted.

And here it is fully planted. I thought I had a door hanger but couldn't find it so for now it's found a home on the back of a bench on my front porch.  Can't wait to see how it fills in.


Sunday, May 10, 2015

Our First Project of the Season- Weekly Update

Progress.  It's almost time for decking.  Wow. 
 

All the outer ledger boards needed to go on this week.  Let me tell you what, that circle was "fun".  Hubby and I tried it ourselves one night but I was out on the ladder holding a board over my head and we couldn't even get a nail in.  I can't hold a board over my head for that long, crazy man!  So, we quit for the night and recruited Caleb the following evening. 
 
 In one night we only got one length of board on, slow!  The next night hubby came home with a plan, he's so smart!  He added a support board underneath and where the boards meet, as well as a longer board farther down and was able to get started on his own (Caleb had to work and let's face it, I'm no help at this).

Here we are a little farther down.  See his longer support board, so smart!  Then, as if I wasn't already impressed, he comes out with a ratchet tie-down to pull in the curve.  Wow, worked really good and without much help he was able to make some progress. 

Some other interesting "helps" he's come up with.  Gotta be a little inventive when your only helper is me.

This is how he cut the joists off in order to form the circle.  He has a board screwed into the center of the circle that measures the diameter and rounds the circle to mark the joists to cut for a perfectly rounded circle. 
 
This one is great.  There's absolutely no way this could have happened with only the two of us.  I could carry the board to help get it up there but holding it for any length of time, over my head, that's just not within my physical capabilities.  Not gonna happen.

See that small piece of 2x4 sticking out.  There were two of them across the width of that long front ledger board.  The two of us put that up.  I'm still shocked.  I helped him lift the board up onto those two supports while he screwed it into the ends of the joists.  If it needed to come down a little for level we could twist the board out from under it and then put it back quickly.  Amazing how well that worked.

One of the joists was pretty wonky and needed more serious help so we wedged a long piece of 2x4 underneath that went to the ground and used a hammer to wedge it in as far as we needed to level it off so it could be nailed in. 

And looky here, that's the decking.  Cannot wait to start putting it on.  It's all coming together.


If you're interested in following our deck project you can find all the links here:   http://thechirpingfrog.blogspot.com/2015/03/our-first-project-of-season-2015.html
I will keep it updated as work continues. 

Saturday, May 9, 2015

Furniture Projects Coming Soon

I have a backlog of furniture projects to work on that have been sitting around for far too long while I work on other things.  It's time to get busy and clear out my stash so I can buy more, it is garage sale season afterall. 
 
Here's a look at the pieces I'll be working on and what I'd like to do with them:
 
This great end table is in really good shape with some problem areas on the top.  I am considering doing some tile work by adding trim-work around the edges but I'm not going to paint it, I might sand it down a bit and add some touches of distressing but the finish looks really good. 
This is a perfect piece to become a "dog bed" since the inside is just one large open space.  Still thinking about that one.  Another great option would be to decoupage a piece of decorative paper onto the top surface.  My goal is to funk it up just a little bit without painting the entire piece and use things I already have sitting around from previous projects. 
 
 
This is another great end table I picked up recently.  I am definately going to paint this one.  The finish is rough on top while the rest of the piece looks to be in great shape.  I love the rustic nature of it and even like the finish but the qualities of the wood and shape of those legs, it's going to take paint beautifully, so paint it is!  What color is still up in the air.
 
 
This piece I really love.  It's a vintage hutch I found at Salvation Army nearly 15 years ago.  I used it in previous homes and again when we built our current home.  The top has always had some issues but I just put a narrow mirror over the top and that hid any of it's imperfections, for the meantime anyhow.  A few years back my grandmother moved in with us and she gave me her dining room set so I no longer had room for this piece.  It found it's way out to the shed and just recently I brought it inside.  The shed was not a good idea!

Also, when we moved it the last time, a leg got broken.  I never fixed it I just propped it underneath and filled the cabinet.  It did fine for a while but don't touch the cabinet, please!  Anyhow, here it is awaiting its make-over.  I've taken the doors off  (they were covered in mold and no matter how I tried to clean them they just look awful).  The drawers are set aside, but look at how bad the wood is.  All along the bottom here and also the top is just ucky. 

 
I have a plan for this piece to turn it into a bench with all that glorious storage underneath.  It'd make a great entry bench with shoe storage and a cushion on top.  I would have loved to paint the top and leave the rest wood but with our shed storage debacle I've decided I'm just going to paint it and be done with it.  I am really excited about giving this piece a new life and can't wait to get moving on it.
 
Here's the doors.  I also have a plan for them.  It'll be another project of it's own, using a poster I purchased a while back ago.  It's perfect!
 
Lastly, my beautiful bench I purchased from a friend who was cleaning out.  I have always wanted a church pew and this one is really wonderful, although quite rough and in need of some TLC.
 Its in desperate need of a good sanding.  Until that's done I'm not quite sure what I'm going to do with it.  I might simply add some stain and be done with it or I might do a wash with paint.  I'm leaning towards a wash just because of where I want to use it and I'd like a little splash of color in that location.  We'll see.  If it sands out nicely I'll probably leave it alone and add color with a cushion.

It bows quite a bit in the center.  I am planning to construct a simple box system to put underneath for added support and some storage.  It's going to be beautiful when it's done and give me much needed seating when we have company.
 
Are you currently working on any furniture projects.  Feel free to share, inspire us! 


Friday, May 8, 2015

Plastic Bottle Planters

 
I've been thinking about what to do with the plastic bottles my hubby's favorite grape juice comes in. Multiple ideas have come to mind and today, I got to work.
 For this project you'll need a plastic bottle of your choice, cut in half (top and bottom), a piece of rebar roughly 6' long and 1" PVC pipe roughly 5' in length. An assortment of tools would be quite helpful, potting soil and an assortment of flowers to plant.   Here's a look at my wheelbarrow full of supplies, let's get started! 


 I don't know the technical name for this tool (I call it a pounder) but it really helped to easily get the rebar down into the ground roughly 1 1/2 feet. Hardest part was holding it over my head to get it over the top of the rebar. Worked like a charm.

 Here's a look at the bottle bottom. I need to drill a hole. I used a 1/2" drill bit since that's the only size I could find but a 1" would have been perfect.
 Also, cut the PVC pipe to the desired length for the placement of your bottle. I have mine roughly 18" off the ground, and slide it over the top, followed by the bottle bottom.
I used a sawsall to cut the pipe, if you've never done this be careful, it likes to jump around. A hacksaw would work as well.
 I added some potting soil into the bottle and started planting. I chose three different plants; a beautiful lime green potato vine, 'burgundy star' petunias and 'dark knight' sweet alyssum.
 For the top part of my planter I used the top of the bottle with the hole for pouring. My PVC pipe didn't quite fit into the hole so I used the sawsall to give it a quick shaving. It looks nasty but it worked wonderfully. I simply slid the shaved PVC pipe end into the pouring spout on the bottom of my new planter and slid the whole thing over the piece of rebar.
 Since the hole is larger and would allow dirt to run down into the pipe I used some mulch to clog the hole a little and then went ahead and planted the upper planter. I left the rebar sticking out at the top so I used another small piece of pipe to finish it off (and will be adding a cap once I make a run to the hardware store, didn't have one of those laying around).
As I'm sure you noticed I didn't bother to take the labels off of the bottle (lazy, I know). This was a quickie project so I didn't take the time and the flowers will fill in so quickly they'll be hidden anyway. You could also paint them and the PVC pipe if you chose.
 I have enough flowers to make a total of 5 but only had enough rebar in the desired length to make two. The others will have to wait.
Here's a look at the second one. There will be grasses and a lilac in the back, coneflowers all around, daylilies to the left with a rose bush and privets with Russian sage on the other side. Once it fills in it should be gorgeous!
If you look closely you can see the first one in the background.
 Here they are from the other direction.
I can't wait for them to fill in and to get the others done. Hopefully in a couple weeks I can try out another one of my ideas using these same plastic bottles.

Thursday, May 7, 2015

Backcountry Camping Preparation Has Begun..... Time to Get Moving!

In July my family will be heading out to The Tetons for our yearly camping trip.  Every week I tell myself to jump on the elliptical and work out and with every week that I ignore my good sense, our trip is getting closer and closer.  Time is running out and I'm procrastinating.  Not a good combination when everything you need will be strapped to your back and you'll be walking roughly 10-12 miles a day.  I've got to get busy!


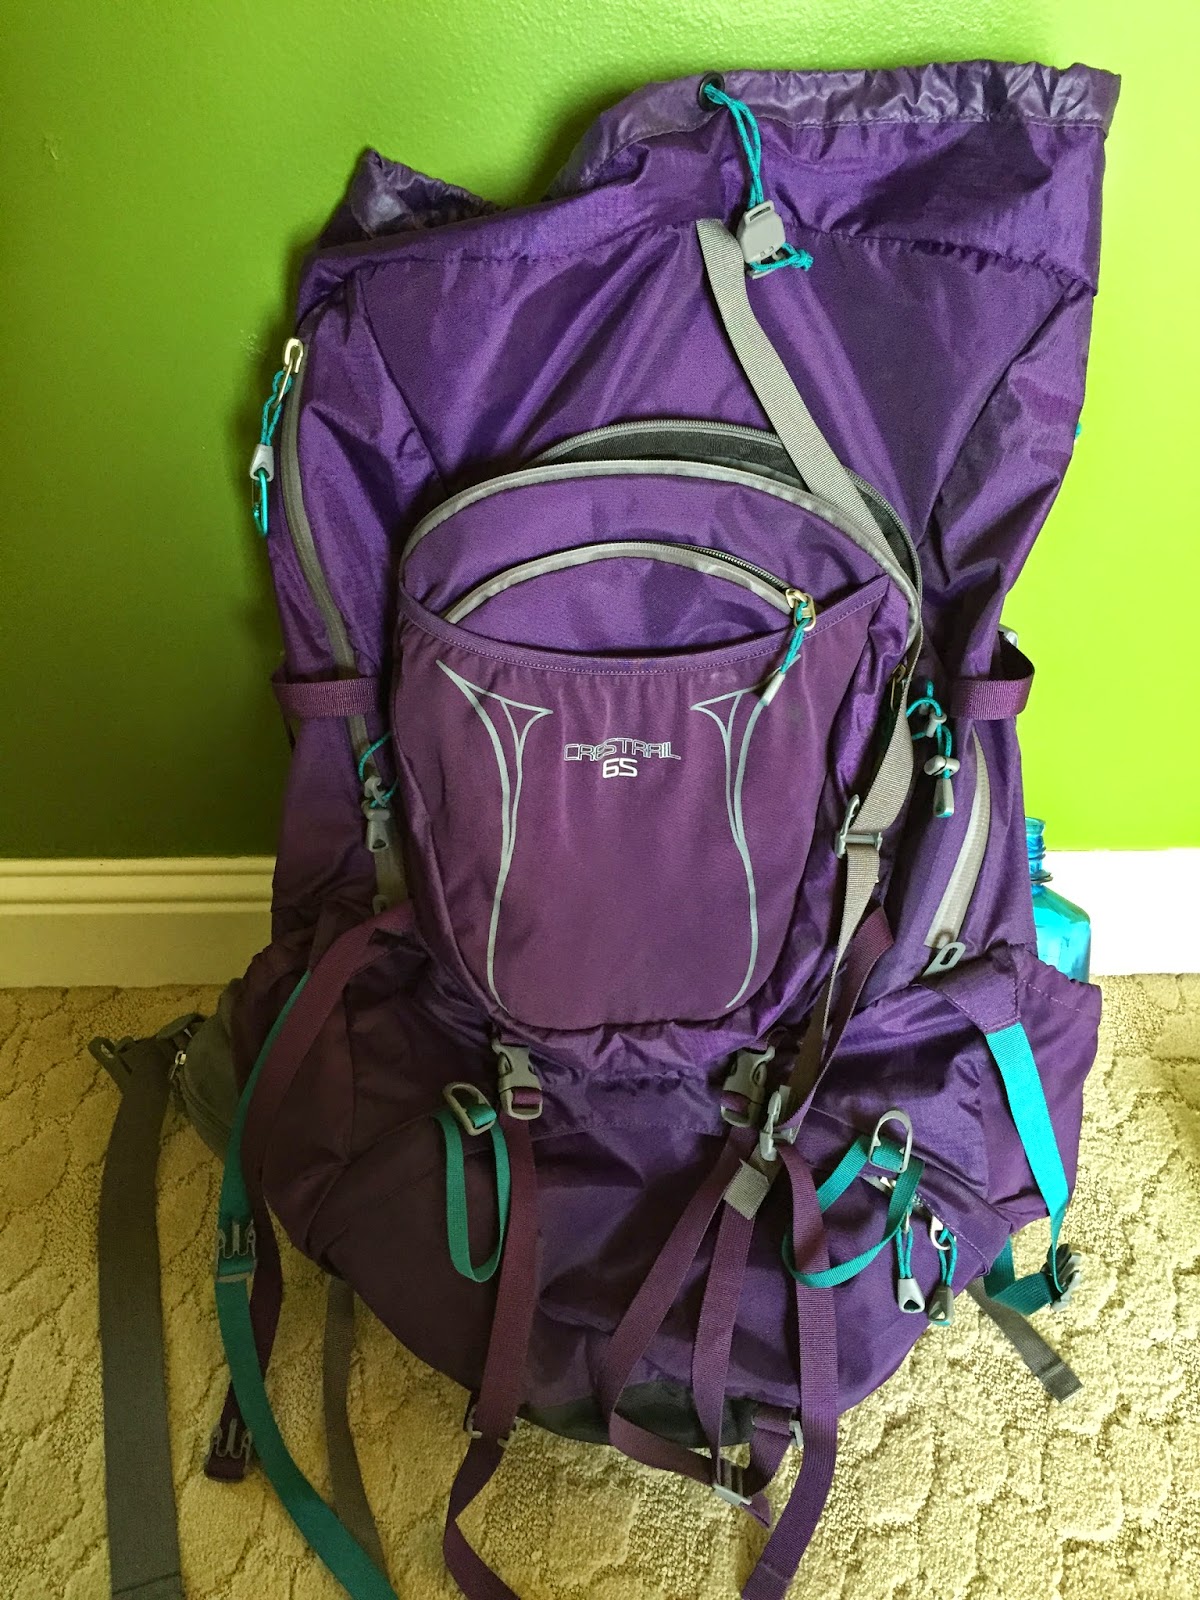
My pack is an REI pack and I really love it.  I did some research and there was another brand pack that came highly recommended but when I tried it on it was really uncomfortable and not a good fit for me.  This one fit like a glove and felt good from the get go.  Always try on and don't worry so much about the reviews, go with what feels good for you.
 
  You'd think by looking at it I could pack for a week and still have room but looks can be quite deceiving.  At 65L of carrying capacity it's amazing how little I can actually cram in here.  I couldn't carry everything I've got pictured above, mainly because of the size and shape of the objects.  Today I'm going to share with you my "training" pack,  I'll be carrying it while taking the dog for her morning walks (which become runs at times so I'm starting really light so I can adjust to that, it's gonne be interesting).
 This is the sleeping bag we carry.  Really warm and comfy.
 For added comfort and warmth we also carry a sleeping pad (in the black bag).  It's a blow up, lightweight pad that I believe is 1 1/2" thick when blown up.  Really quite comfy.  The sleeping bag is see thru on the bottom, it's made to work with the pad.  The pad is said to reflect your body heat back up while blocking the cold ground.  I was a little nervous about a sleeping bag with no padding on the bottom but it's really quite warm.  The orange bag is a liner, which also adds some warmth to the equation but it's main purpose is to protect the sleeping bag and make it last longer.  You could really just use it some nights but I love the warmth of the sleeping bag.
It's also a good idea to carry something to protect your pack and all your belongings from rain.  You could just as easily carry a black trash bag.  We only used this once on our last trip for a couple hours.  Honestly, I'd rather carry it and not need it than be stuck in a downpour without it and have everything be soaking wet.  I don't mind the rain, but if I'm cold, I'm miserable and trust me, keeping me from getting too cold is a necessity!
 I also carry the tent.  This is the one we have, it's really easy to put up and take down and it fits two people comfortably.  We did add some waterproofing along all seams as recommended and sprayed it with bug spray as well.  Worked great!
 This is one of our lovely bear vaults, they are required in the parks that have bears.  When it's full (all food, soaps, bug sprays, anything with scent, goes in here) it weighs from 10-12 lbs.

 This is my rain gear.  I don't really like it, it's quite uncomfortable and stiff, but it does work to keep you dry.  Trust me, this is a must, not only for hypothermia issues but also for your sanity if you're hiking with me and I'm miserably cold. 

Remember what I said about my backpack looking so huge but not really able to carry as much as you'd think.  Here's a look at that.  This is the pack with my Frogg Todd's in the very bottom and my sleeping bag (with the liner in it) on top.  It takes the entire space on the bottom of the bag.  Still have a ton of room, right!
 Next goes the Bear Vault.  Now I have a small amount of space on either side of the bear vault and a couple inches above.  That's it. 
 I usually bring two changes of clothes and a small jacket.  I've added my sleeping pad rolled on one side and any clothes I add will be rolled and crammed down the side of the pack.  I have water shoes that we use for camp shoes that fit on top of the vault and a few small odds n ends.  Done.  That's all the interior will hold.  There are a variety of pockets all around for small items and pockets for water bottles on either side.  By the time I'm done they're all full.
I put the tent on the outside across the top.  I always see pictures of people carrying it on the bottom, the pack has straps for that but it feels awful for me, pulling me backwards and hitting me in the butt every time I take a step.  No thanks.  Putting it at the top helps with balancing and feels much, much better.
 
For now, with the following items, my bag weighs 12.4 lbs. 
Frog Togg Top and Bottom
Sleeping Bag and Liner
Sleeping Pad
Empty Bear Vault
 
This is what I'm going to start with in order to walk/run with the dog.  Hopefully running won't be too bad and I can add weight quickly, giving me more time to get used to the full weight of the pack and all it's items.
 
 Last year it was 35 lbs on day one.  Hoping to trim a little bit off of that this year but really, I'm carrying things I'm not willing to leave behind so probably not.  Jason on the other hand, started with a pack weighing 45 lbs and carried many things that were non-essentials and we never used.  I'm sure he'll be re-evaluating what he brings.  
 
Next time I'll share with you a few of the other items we carry and be adding a little bit more to my pack.  I've got lots of dehydrating to do as well, it'll be here before we know it, and food is definitely a priority. 

Have you ever done any backcountry camping?  If so, what were your necessity items and what could you live without?

Wednesday, May 6, 2015

May in My Gardens

This is such a great time of year, I love clearing out the beds and seeing how things are doing, taking an inventory of what needs to be done (it's usually a fairly long list) and watching everything come back to life.  It always amazes me how quickly the beds go from scraggly winter debris to full and fantastic spring growth. 


Here's a peek into the many different areas of my yard and what's happening this spring.

Those gorgeous purple blooms blow me away every year.  Yes, I planted a locust tree in my landscaping.  I have been told by many what a stupid thing that was to do but those blooms take away any doubts every spring.  I'll deal with the negatives if I can have blooms like that!
Right now the lilacs are blooming and the smell is heavenly.  I've got windows open and am loving every second of it. 

 Hubby got my fountain put back together but we haven't gotten it turned on yet.  Another job this spring is to paint the front door.  I'm thinking a bold color is in order, not sure yet but a beautiful shade of turquoise might just win out.
 Coneflowers are ready to roll.  This is a newer variety that just got planted last year.  Hoping they take off and do some filling in this season.
 My poor little variegated Wiegela's don't get enough sun here.  I need to cut a few limbs off surrounding trees to let more sunshine in.  They bloom, just rather wimpy.  I love the leaves, the touches of pink/purple are beautiful.
 The last of the magnolia blooms.  This is their second year and they bloomed beautifully this year.  I was told this particular species has a tendency to bloom twice in one season.  Wouldn't that be grand?
 Japanese maple with Shasta Daisies all to one side.  When they are blooming it's just spectacular.  Can't hardly wait!
 These little creepy crawlies are everywhere this year.  I have always had a few but they've eaten half the purple cone-flower leaves in this bed already and are working on these now.  They gotta go. 
My favorite bush of all time (well, one of anyhow), Japanese Dappled Willows.  I pruned these once already this season (not even a month ago) and look at how full and beautiful they are.  Time to chop at them again.
 This is a portion of the front flowerbed with the three berms that is a continual work in progress.  I am standing at the willows in the front berm at the drive.  You can see the right berm in the background and a seating area.  There is another berm off to the left (out of the picture).  Most of my work this season will be in this area of the yard.  Hoping to get a walkway put in and get the middle and edging done.  That's probably pushing it for this year but one can dream!
 The far side of the island.  Wiegela's in the background getting ready to bloom.  They are just beautiful when in full bloom.
 Peonies are about ready to pop.  I've got to get in here and clear out some branches from the birch tree.  Too much shade, but they seem happy for now.
 Another view of my fountain.  The bare spots in the front left of the picture by fall will be full of black-eyed susans.  One of my favorites (I sure do say that a lot, can't help it, I love them all).
 The island with my amazing purple locust tree and all the invasive's.  When people warn you against planting certain plants and call them "invasive", this is what they're talking about.  There's multiple knock-out roses in this photo, can you see them?  Neither can I and I know where they're at.  At this point it's easier to remove them and plant them somewhere else than try to keep the crazy growers at bay.  Yep, invasive's.  I have a love/hate relationship with them. 

 I bought 14 of these little Azalea's years ago for $2 each.  They are very slow growers but are blooming beautifully.  Some have been choked out (did I mention that I like invasive growers quite a bit) so I need to get them moved.  Thank goodness I have plenty of space around here.

 
How is your landscaping looking?  Do you have a long to-do list started as well?  I so enjoy all the time spent playing in the dirt and creating my gardens.  Lots of maintenance, but I wouldn't have it any other way! 

Related Posts Plugin for WordPress, Blogger...