Thursday, May 28, 2015

Our First Project Of The Season

When I left you last, the new deck was almost ready for decking.  Now, the decking is on and it looks fabulous.  Hubby is doing a great job!


We had a couple days of rain where he really couldn't work outside too much so he spent that time planning and prepping.  He planned the decking out on paper and got much of the cutting done and laid out in the garage. 


We are using IPE Wood for the decking material.  It is a really hard wood and lasts much longer than other decking materials, and the best part, I don't have to stain/seal it every year.  That was a major selling point for me. 
 
The Cedar posts are here as well and the rebar for the railing. 
 
 It has been quite the adventure and we're at the final stage, can't wait to see the railings go up.  Hubby is working on the water dispersal system as well, it'll be metal but not sure if we're going to let it rust or have it coated?  We both like the rusted, aged metal look but there is going to be an overhang and not sure we want it dripping onto the concrete patio below.  Not sure what he'll decide on that one.


This area underneath is where an outdoor kitchen will eventually go.  That's going to be a fun project too.  Not sure when that'll get started?
 
Stay tuned!  Railings and water dispersal are coming up next.


Wednesday, May 27, 2015

Happenings in the Garden

Take a walk with me through the gardens:
 
Primrose is blooming beautiful and the Knockout Roses are all budded out. 
 
 This is going to be full of Purple Coneflowers.  I can't wait for them to start blooming.  The birds deposited all kinds of seeds in the front bed between the walkway and the stone wall and the back area between the purple bush (can't remember if it's a cherry or plum) and the crab apple tree is full as well.  It's going to be gorgeous when in bloom.
 
 I bought two of these clearance roses last year at Home Depot, lost one but this one is happy, happy!
 
Siberian Iris popping at the seams.  I really need to divide them but man, is that a job.  Last time I had to use an axe to get them divided after digging some out, which was not an easy task.  It's exhausting.  Some day it'll have to happen, probably not this season.
 
 
 One of the berms out front is having some bug issues.  I haven't sprayed yet but I'm going to have to.  This plant is a purple coneflower, yet its pretty much unrecognizable and completely eaten. 
 
Here's one of the little buggers.  This is another plant in the same flowerbed, at the opposite end.  Gotta get rid of these critters before they completely destroy this bed and move on to another.
 
 
 It seems a little early but I've got a few Purple Coneflowers already in bloom.
 
We also got the "water works" up and running this weekend.  I just love the sound of running water.
 
 
I know I've said it before and I probably will again and again, but I just love perennials.  I like for my gardens to kind of "sprawl" all over.  Not so orderly and I tend to let them grow wherever they pop up.  Here's another example of "babies" that I'm just gonna let grow and fill in.  I almost pulled them while weeding until I realized, "I think that's a balloon flower" and sure enough, I've got a handful of babies popping up in my front flowerbed.  Thank you little birdies!
 

Tuesday, May 26, 2015

Dog In The Yard, Oh No!


Miss Pepper is absolutely terrorizing my poor yard.  She loves to run through the flowerbeds, chew off branches, play keep away with the bushes, hiding her toy somewhere within its branches, then pouncing on it to re-claim her prize.  Crazy dog has really done a number on my yard.
 
Hoping to get a fence going sometime this season to give her access to the lake (so she can cool off when she needs to) and give her plenty of space to run, without doing figure eights through my flowerbed flinging mulch in all directions as she goes.
 
See those bare spots at the bottom of this bush.  I couldn't figure out why the limbs were turning brown and dying until I went a little closer.  Crazy dog has chewed off many of the lower branches.  She "plays" with the bush, using it to hide her toys.  I guess those bottom branches get in her way because she has systematically removed them all.
 
 Here's just a few of the branches.  There are three of these bushes and she runs through them, over them (straight into them at times) and has cleared herself a nice little running path.  I've never had a dog be so destructive in my landscaping, I am really surprised at how good things actually look because she's been just a tad hard on them.
 
 Here's one of my grasses that she hasn't destroyed yet but this is a perfect example of what she does with her "toys".  Yes, it's a sock, she steals them all the time and plants them in the bushes or grass and then proceeds to "attack" them, doing a number on the plant while she's at it.
 
 This is one of her favorites.  Normally, this is a beautiful grass, full and beautiful.  Not this year!
 
She LOVES Knockout Roses, go figure.  I've chopped them off at the ground before and they always come back but look at how she chews them off.  I was sure she'd killed this one.  All that gnawing was bound to let some type of disease in or kill off the plant somehow.  Shockingly enough, that rose is beautiful this year. 
 
 
 One final example of this crazy dog's love for my flowers:  
This is an indoor plant that she "nibbled" on.  Chewed off a huge beautiful limb.  I was so mad at her, but look at what it's doing, new baby limbs are sprouting out.  Wow!  Maybe she needs to chew off a limb every once in a while.
 
  I am hoping a larger space will help dissuade her and I'm sure a little training would be a good thing but really, I'd rather move it all and give her the yard than spend time trying to keep her out of it.  Lazy, yes, but there are so many other things to do in a day and so many other training needs that this one, really, is the least of my worries.  Now, if the fence, which will allow her access to all the rest of my flowerbeds, doesn't dissuade her and she rips into them, that might change my mind.
 
Does your dog do things like this in your yard?  How do you handle it?
 

Sunday, May 24, 2015

Tiling is Underway, Yeah!

 
Today, if all goes well, will be my last day tiling in the shower.  We can then get the glass surround people in for some measurements and get the shower up and running.  Not sure if the floor is next or the vanity area, but for now, let's just concentrate on the shower.

Here's a reminder of what I started with:

First step, a friend of the family who's a plumber came in and demo'd the wall on the right into a half-wall, removing the shower plumbing and running it into the left wall.  He also had to deal with a vent that ran through the end of the wall out in the room.  Done! 
 
He placed the shower basin and prepped with Durock.  Now it's my turn.
 
Tile shopping is so much fun.  There are so many great tiles to choose from and I love putting it all together and coming up with a design.  We shopped only box stores (we took a look at a high end tile shop but wowzer, gorgeous stuff but really expensive!)
 
The mosaic tile is a "knock-off" of an expensive tile that we really loved, but half the price.  This one will look great.  After our day of shopping I got a call that they'd like to incorporate the expensive in the shower only and still use this one everywhere else we had planned.  Not a problem, they should blend together nicely since they won't be right next to one another.
 
 Here are a couple layouts I was playing with to decide what I wanted to do.  I really thought I'd love the right picture using full tiles but I also want three stripes and the proportions are all off to do that.  So, second attempt (on the left) with slightly more than half a tile for the accent it is.  Perfect!  It's going to look fabulous!


First step is to mud and tape the seams as well as the screw holes in the durock.  I've also got a board at the bottom, one tile up, as a support.  The bottom row will go on later.
 Day one:
  Feel like I got nothing done, lots of prepwork.
 Day two:
  I only worked about 4 hours today. 
 
Day3:
We are now ready Superior Home Products to come in, measure and get working on the glass door and surround  (as well as a countertop).  I was short one mosaic tile to finish up on the right edge and a have a TON of clean-up work to do but at least we can keep the ball rolling.
 One of the many little problems that popped up:  You can't really see this little half wall from the entry and we didn't want to waste the expensive mosaic so we opted to not use it on this wall but I still wanted my tile runs to line up.  So, I went and found a 6x6 and we are using it in place of the mosaic and as a topper.  It'll also run along the outer edge of the wall (finished edges on both sides so it'll finish it off nicely, without spending the extra money for corners, why spend it if you don't have to?)
 
If you could tile your dream shower what would it look like?

Saturday, May 23, 2015

Mosaic Table

When my boys were little they had an excellent art class at school.  They brought home some really great projects.  I found a coffee table at a garage sale with good bones and it already had the "inlay" top ready for tile.  My oldest son drew out the pattern on the top and I added the mosaic.  I still love the results (we made this table nearly 13 years ago). I'll never be able to part with it. Right now its in desperate need of a paint job- that'd make a good winter project!
 
I love his design, kind of an abstract "owl" "elephant".... something!                                
 
It's easy to add a mosaic to any tabletop especially if it already has an "inlay" area with raised edges. If not, simply add some trimwork around the edges and you're ready to go.
 
I mixed mortar (I always have bags of it laying around) but it'd be easier to simply buy a small container of pre-mixed. I also don't spread it on the table as if I'm tiling a wall. I simply butter each piece individually. Otherwise, you loose your design.
I broke the tile and used "nippers" to form them a little more if needed.
 
Every time I see this table I smile. I see two eyes looking up at me.
 
I chose a neutral, light grout. Again, you can mix your own or buy premixed. I also sealed the grout to keep it from staining too badly. It does have a few spots but it has held up very well.
 
It was a great project and a fun way to involve the kids (the one willing participant anyhow). He calls it "his" table. In a sense, it really is!
 
Have you done any mosaic projects?  I love the look but have only done a couple other projects.  Feel free to share your projects.  I'd love to see your work.

Tuesday, May 19, 2015

My Next Sewing Project is Almost Done!

I am making panels for a client's kitchen, one large window and the slider out to the backyard.  She chose a beautiful yellow/gold fabric with a dull finish on one side and a shiny surface on the other.  It can be used either way.  We opted for the softer finish, it's going to make gorgeous panels and drape beautifully.

So, out comes the folding tables again. 
I cut the front fabric into 9 widths that will be combined into 4 separate panels for the necessary width to cover the windows with a 2.5X fullness. 
 
Then I did the same for the lining.
 After sewing widths into the proper size panels I went ahead and sewed a 2" double hem in the front fabric and the lining.

I keep a tape measure handy and turn once, ironing as I go, turn a second time, give it a crisp ironed line and pin it until I get it stitched.


Here I am getting it all put together and ready for the finishing touches.  I have found the best way to work with these larger panels is to work on the floor.  I vacuum first of course, then I clear out all the furniture (yep, I make a huge mess) and lay out the face fabric, front side down.  Layering the lining, front side up on top.  The hems are at the top of the photo, the lining is roughly 1" higher than the face fabric.  I have determined my finish length so I use a tape measure and mark that length at the top (which is the bottom of the picture).  I use that mark to fold down the top hem, encapsulating the lining fabric while I'm at it, temporarily pinning it in place until I can get it machine stitched.
 
The side seams I do by hand.  I fold them over in the same way and pin them all in place.  I iron all the way around and then hand stitch the side hems and machine stitch the top seam (this is where the weight of the panel will hang so I want a sturdy, machine stitch here).  These will hang from a rod with rings so no pocket is necessary.  Easy peasy!
 
I have one more panel to hand stitch, a little more ironing and they're ready to hang.

Monday, May 18, 2015

My Weekend Fun

 
The Stepping Stone Mosaic Pathway has finally begun.  I am so excited to get to work on this project.  Between periods of rain Saturday I was able to edge it in and am hoping to dig it out over the next couple weeks (maybe sooner if I can bribe my son to help). 
 All I can say is, "thank goodness for rain"!  About the time I got this done and took a break, it poured, the timing couldn't have been better.  I'm not sure my body could of handled too much more.
 
 The dog is Marley, one of the neighbor's dogs who spends much of her free time hanging out over here, she's helping!

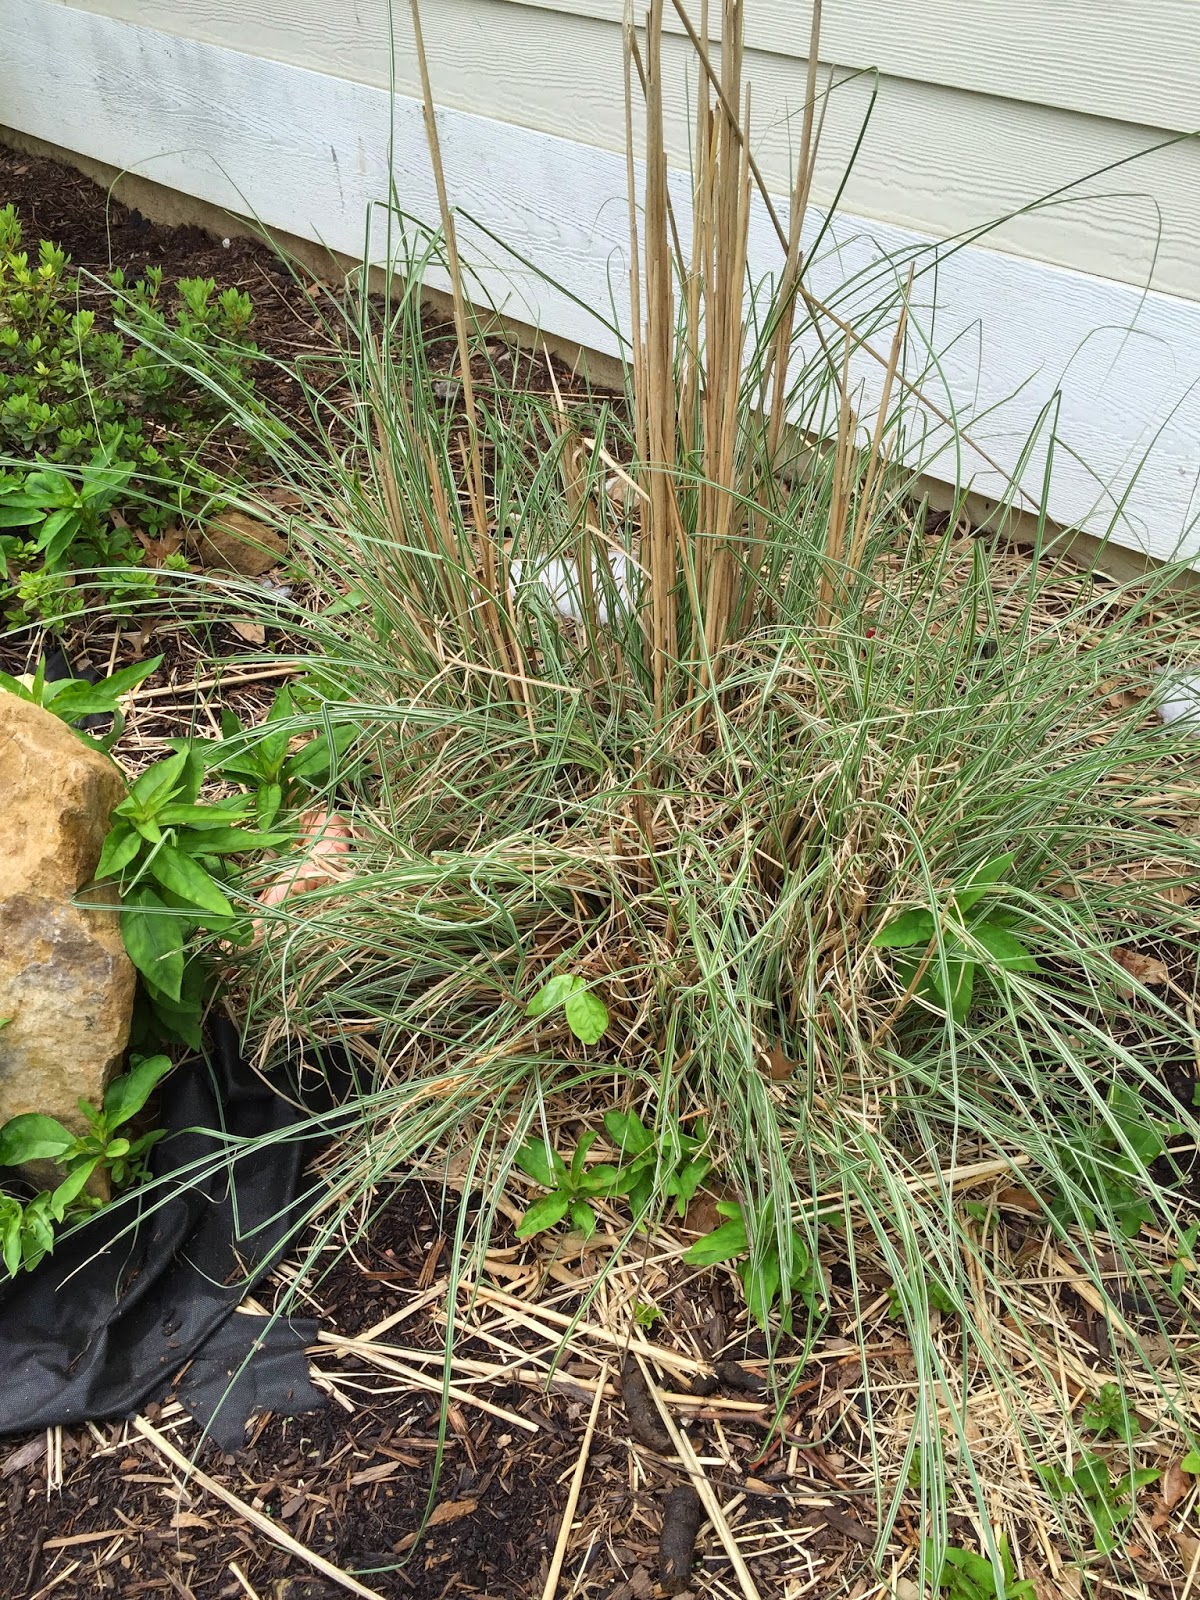
I love a meandering path, obviously.  Between the trees is going to be a little bit of a problem but that's where I want the path so I'm making it work.  It might have to be slightly narrower than originally planned. 

This is the end of the path closest to the house.  This circle will have some kind of "artwork" in the center with a circle of lavender with the arborvitae at the "corners".  (Yes, yes, I know, a circle doesn't have corners.  I told you it's a work in progress, it'll all come together in the end).
 
 These are the other two pups that spend time visiting me whenever they are loose.  Minnie and Max, also the neighbor's dogs.   The bottle fence I've shared with you in a previous post I'm hoping to install at the entrance to a short path leading into this circle.  The path continues on the other side to another circle that will eventually, when it grows in, become a willow structure.   Lots more work to do but at least I've got a start!
 
 
Sunday, I spent all afternoon shopping for tile with a friend from church who's bathroom we are starting this week.  I just love shopping for tile and putting it all together.  We had such a great time and found some wonderful tiles to work with.  Can't wait to get started.  Here's a peek at what we've got.  You'll have to wait for a future post to see how we're going to use them. 
 
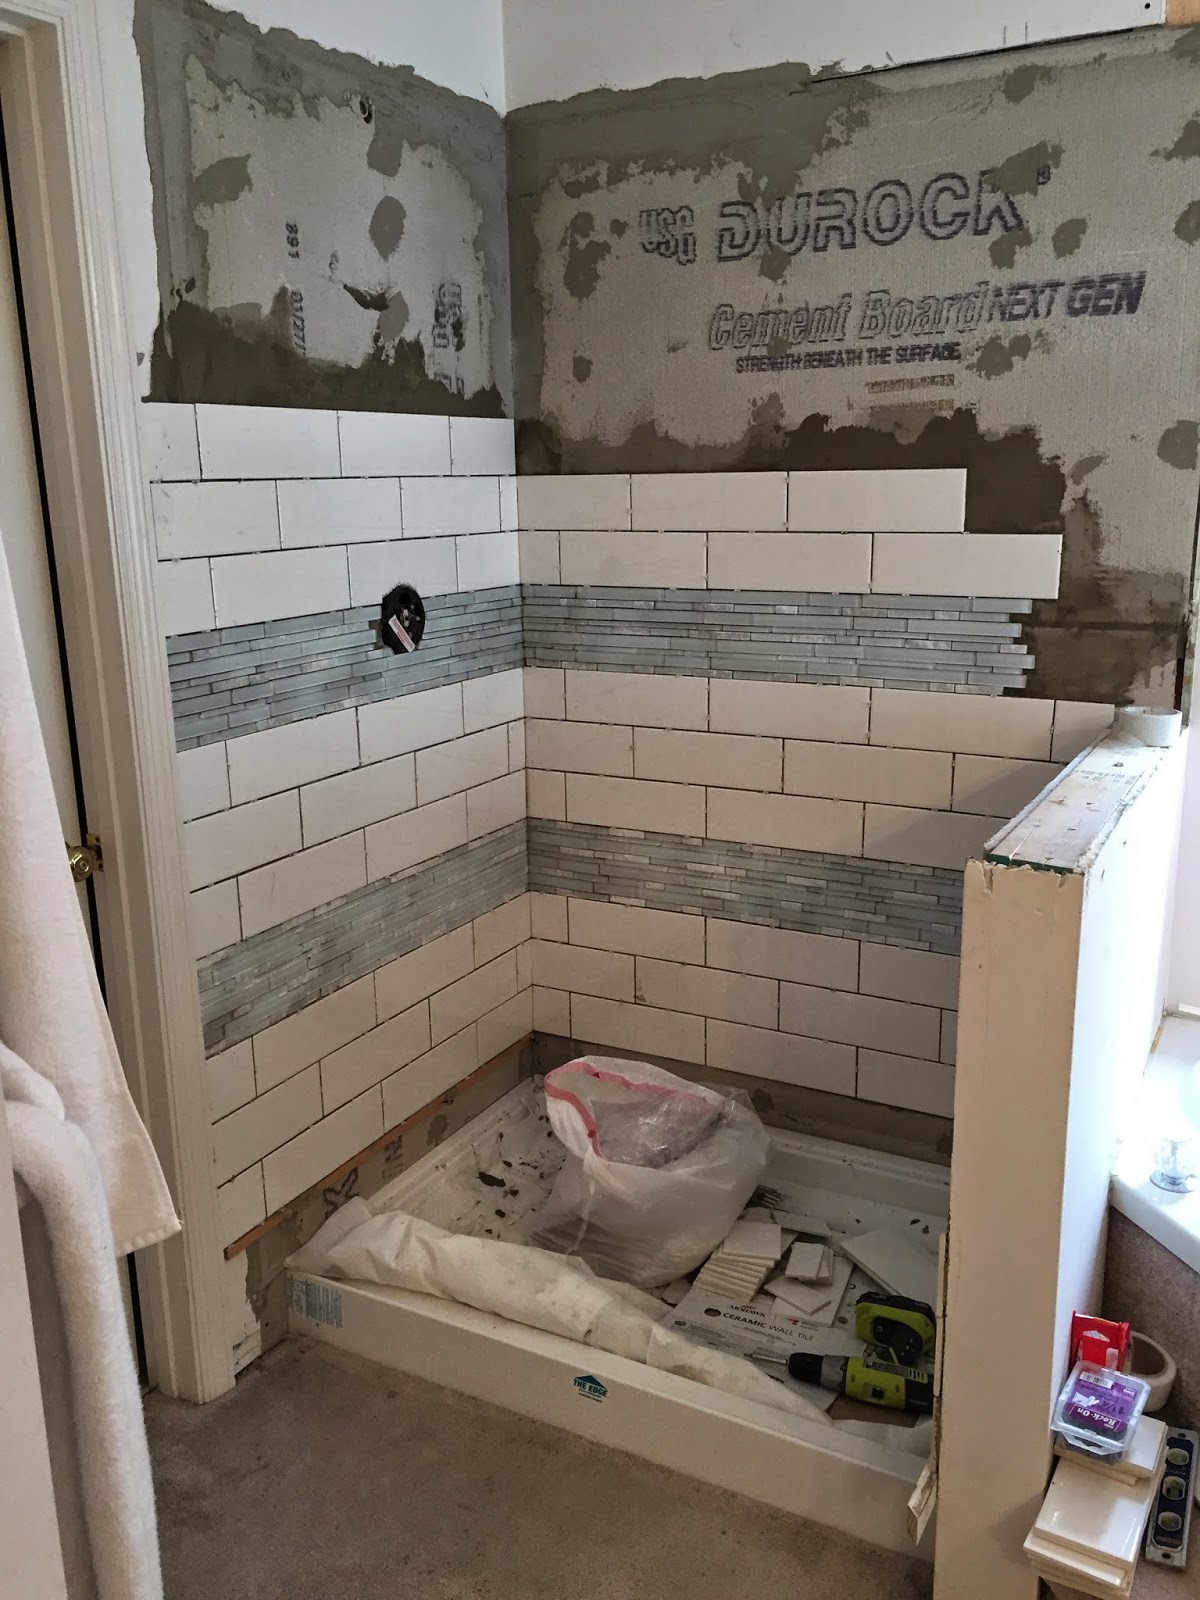
The small mosaic glass tiles will be an accent wall at the vanity as well as some accenting in the shower.  The white 4x12's are the main tiles run in a running brick pattern and the grey is for the floor.  Originally they were thinking glass subway tiles or the longer version you see here (only glass) for the main tile but wow, talk about expensive.  The white looks really nice with their project and fits their personalities as well for 1/4 the cost.  Leaves more money for the next project.
 
They are going to be using the space as we remodel so we'll be working in stages.  First thing, the shower.  The plumber has done his part and then some.  He had to pull the old shower surround, rearrange a vent, pull the water from the right wall into the left, tear out the right wall making it a half wall, set the basin and get me some durock on the walls.  It's almost ready for tiling.  I have a small piece he forgot and then I'll be ready to rock and roll.  I cannot wait to get moving on this, it's going to be gorgeous when all is said and done. 
 
Hope you had a productive weekend, whether relaxing and enjoying some sunshine or working on your latest project, both productive in their own way.  Have a great week!


Related Posts Plugin for WordPress, Blogger...