Saturday, August 13, 2016

My First Completed Manila Envelope Journal

As I'm sure you have figured out by now I've found a new passion..... Art Journals.  So many varieties to choose from and each one can be personalized and made uniquely yours.  They are quite addicting and I can't wait to get The Chirping Frog open so I can share this wonderfully creative outlet with you.  

This little journal is made using a manila envelope and is so simple to create.


The papers I've used are plain on the backside so I've used corrugated cardboard as a stamp to add some interest.

I've got a single signature of ten pieces of paper with a simple pamphlet stitch to attach it to the manila envelope.

The envelope has been cut at the bottom so that the front and back of the journal has a pocket.


This is the back of the journal.

I've added a small velcro closure.

I've done little to no decorating on this little journal, it's got lots of space to journal and would be great for everyday use, perfect for list keeping (if only I were that organized).  Such an easy little project and so versatile.  

Thursday, August 11, 2016

Dining Room Hutch Gets A New Look

I fell in love with this great dining room hutch as soon as I saw it.  I used it for years at my home and then it served as a storage and display piece in my booth at a local antique mall.  I always thought it would look great painted but never took the plunge.  Unfortunately we had a little mishap while moving last time and the upper portion, well, it bit the dust.  Perfect time to jump in and make some changes.  Here's what it looks like now: 

The base didn't go on the same roller coaster ride the top did so it's still in great shape.  I took the doors off, cleaned it up a little, gave it a quick sanding and its ready for paint. 


The upper portion, well, it's been sitting outside soaking up the rain for months.  Looking good!

I was hoping I could salvage the majority of it but that was not the case.  Lots of particle board and signs of its troubles were too numerous to count .

I ended up building a simple box with open shelving to replace it.  

I salvaged the columns from the front and tacked them on at the outer edges.

Gave the whole thing a coat of my favorite color:  green.  It's bold and fabulous!

I will need to add a support in the middle and I'm debating on what to do for the backing.  I've got corrugated metal that I could use but I've also considered wood boards that have been decoupaged to match the top of the base piece.   I'll probably do metal, easier and quicker, but we'll see!

The base had some awful, deep scratches on the top so I opted to decoupage it with some great napkins I found at The Dollar Tree.  I've never used napkins before but my research tells me they are 2-ply and that I'll need to separate the layers.... well, couldn't get anything to separate so figured they were cheap and didn't have two layers.  Yeah, I was terribly wrong!  So they separated partially when I applied them.  Yes, I had a mess.  I'm one of those "go with it" type of gals so that's what I did.  I've sanded it down and am going to "make it work".

The hutch is now sitting in the basement and hasn't been touched for over a month.  With the building project in full swing I just can't seem to get anything else accomplished.  Hoping to finish it up within the next couple weeks and show you a finished product.  I'm loving how it's turning out so far.

What are you working on this week?

Monday, August 8, 2016

10 Holiday Paper Mache Ideas For You To Try

I haven't worked on a paper mache project since I was a kid.  With the opening of my new shop rapidly approaching I would love to include an occasional paper mache project in the class schedule.  So messy, but so much fun.  Here's some great Holiday Projects using paper mache.  

Halloween

You could wear it, hang it or make it smaller to use on another project, lots of options for a witch's hat.
Paper Mache Witches Hat Tutorial
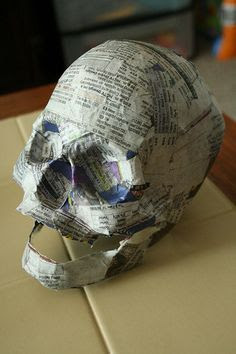
How about a skull, looks a little harder but perfect for Halloween decor.
Paper Mache Skull Tutorial
Pumpkins, so many different ways to do this.  You could stack them and make a topiary or do a face and have interesting wall decor.  Make them tiny with a stick for floral picks or how about a Holiday Tree with little pumpkin ornaments.  So many options, so little time!
Paper Mache Pumpkin Tutorial

Christmas

This is a great video, she's got all kinds of information for paper mache projects.  These Santa Faces would make great ornaments.  Check out her other videos at Hectanooga1 on You-tube.

Such an easy project for great holiday decor.  These could make cute ornaments as well.

Paper Mache Santa Hat-  A great, easy craft for Holiday Decor.
I am completely enamored with these reindeer.  The link ends at Pinterest but with some research into paper mache methods I'm sure figuring them out would be easy enough.  Adorable!
Paper Mache Reindeer
What a great Santa.  I'm thinking a 2-liter bottle could work perfectly for the base.  
Paper Mache Santa
These are from Pottery Barn but how easy would they be with balloons or just a 2-liter bottle for the base.  Too cute!
Paper Mache Snowmen

Easter

What an adorable bunny.  Might be slightly harder to accomplish but well worth the extra effort.
Paper Mache Bunny
Easter eggs, kiddos would love making these.
Paper Mache Easter Egg Tutorial  
Have you made anything using paper mache?  If you'd got a glue recipe that is tried and tested I'd love to hear about it.  

Saturday, August 6, 2016

Easy Thimble Pendant Necklace with Wire-Wrapped Bead Dangles

My mom spent a week with me the end of June that coincided beautifully with a broken toe, giving me plenty of play time for my many crafty endeavors.  I got a lot of things started and very little finished, par for the course, right!  

One of the projects I started was this thimble pendant necklace using wire-wrapped beads left over from previous projects.  Gotta use up them leftovers!

 I started by drilling a hole thru the center of the thimble.  Using a length of 18 gauge wire (roughly 4") I made a loop at one end, adding varying lengths of chain with wire-wrapped bead dangles.  The wire then got threaded thru the inside of the thimble and out the top.   

I finished it off by forming a large loop at the top and wire wrapping excessively down to the thimble.  I really love that look.

I finished it off by adding a long length of chain.  Easy peasy!

I am considering adding an assortment of chain dangles since most of my beads have loops at the base (might as well use them, eh).

I'm always on the lookout for thimbles and other trinkets to use in my jewelry projects.  I've got a great assortment of bottle caps, corks, games pieces, etc.  Now I just need to find some time to be creative and get something done.  

Have you made anything using thimbles?  Do share, I'd love to see your creativity at work.

Thursday, August 4, 2016

Building The Chirping Frog- Part 19

Things are just about ready to take off here at The Chirping Frog.  Interior work is beginning and it's going to be a fast paced roller coaster ride to the finish line from here on out.  Take a look at what's been happening over the last couple weeks.

Windows are in on both sides of the building and all but some trim-work is complete.

Jason and I worked on clean-up and got some finish grading done along the front.

The scratch coat is on and the pillars are ready to be finished.

Got some carving done and today they got stained.  Hoping to seal them tonight.

I played with some leftovers.  I am hoping to work on an art piece for the interior and wanted to make sure my idea was going to work.  Now to plan out what I want to do on paper and get prepped, no time to think about it when the carve coat is hardening with every second that passes.

All the doors are hung and the hardware is partially installed.  I got them sanded, primed and painted. 


Yes, I went with black.  I wasn't sure what I was doing when I ordered windows so I did white trims, thinking I'm going to paint them black as well.  When I look at the side of the building I can't help but see this: 


The bathroom doors are primed and ready to be papered.  The storage room hasn't been touched yet, soon!

This is all that's left to get us closed up. half of one side and the front entry.  So close!


The air conditioning curbs are ready to go.  Heating and cooling can now begin.  Yeah!

We will be working on framing up the sidewalks and front entry so that the parking lot work can begin while the interior work is happening.  Cannot wait to get this out of framing mode.  

Here's weekly updates from the beginning if you're interested:
  • Part 1- Clean-up
  • Part 2- Dirt Work
  • Part 3- Tons of Rock & Footings 
  • Part 4- Foundation Walls
  • Part 5- Foundation Walls Poured
  • Part 6- Forming Bathroom Walls
  • Part 7- Bathroom Walls Poured
  • Part 8- Rock, rock and more rock!
  • Part 9- Concrete Floor Pour
  • Part 10- Clean-up
  • Part 11- Framing is Underway
  • Part 12- Trusses
  • Part 13- Trusses Are Up
  • Part 14- Metal Started on Roof
  • Part 15- Roof and Concrete Wainscoting
  • Part 16- More Carved Concrete and Pine Log Entry gets installed  
  • Part 17- Concrete gets stained, doors installed and grouted, still working on getting us closed up.  
  • Part 18- Framing interior walls.

Still lots to do but wow, its all coming together and soon we'll be opening our doors for business.  Can't wait!

Tuesday, August 2, 2016

12 Cute & Creative Ways to RePurpose License Plates

Walk into any antique shop across the country and you'll find a variety of license plates available for purchase.  I've never really been interested in them much, until now.  Check out some really great ways to use license plates to decorate your home.

How about this adorable Christmas Tree?  It's getting to be that time of year again, why not create a license plate tree this year.
www.apieceofrainbow.com
I don't know about you but I've got mail all over the place, can't seem to keep it corralled.  What a great way to keep things organized, and it's cute too!
www.instructables.com

This has inspired me to make something for the bathrooms at the new shop to give me a little storage (ya know, for the essentials).
Down Home Rustik on Etsy

Just love this.
Found on Pinterest

What a great idea.  My mind immediately goes to book covers.  Might have to try that (I have my grandfathers motorcycle license plates in my cupboard, thinking a journal is in order).
itsinthemaille.com

What a beautiful flower.  You could design any shape of flower or animal you'd like, think of the possibilities.
Fox Hollow Gallery on Etsy

Very cute.  Names, quotes, bible verses, again, the possibilities are endless.  What would you frame to put on your wall?
Cobalt Moon Jewelry on Etsy

This is fabulous!  You could do an accent wall, a headboard or even cover a door.
NobleTreasures

Cute little birdhouse.
Rustic Cabin Man Cave on Etsy

Lots of possibilities for lighting, these little pendants are adorable.
 From Design Bump- 33 great lighting ideas made from ordinary items.

I need to make some of these, what a great idea.  Growing up, every vacation we'd hit the souvenir shop but never did I find my name on anything, an initial, now that might work!
 from Pinterest

Another great idea.  
 Found on Pinterest

I am hoping to make business cards holders for the new shop, maybe some advertisement holders for the foyer as well.  So many possibilities, so little time!

Have you made anything creative using license plates, we'd love to see what you've done.

We'll be hosting a Painted Birdhouse Class here at The Chirping Frog:

March 18th
April 1st 
May 6th


Cost.... $41, you bring the license plate and all other supplies will be provided.  If you want your birdhouse to match your house colors then you'll need to bring paint as well.  All classes begin at 1:00pm.  Please pre-register by stopping by the shop, give us a call or use our Facebook Shop.
Related Posts Plugin for WordPress, Blogger...