Wednesday, April 15, 2015

Quick and Easy Taco Salad Dinner

When my husband and I met in college there was a small group of us that took turns cooking a meal to share with one another.  Taco Salad is the meal my future hubby prepared.  We've been making it ever since.  No, it doesn't qualify for our "no added sugar or preservatives diet" but neither does the doughnut I had for lunch yesterday.  (I didn't say I was doing good on the diet, I'm having an awful time).
 
Anyhow, here's what you'll need:
 
1 lb. Hamburger
Pkg. Taco Seasoning
 
Lettuce
Shredded Cheese
Taco Sauce or Salsa
Mayonnaise
Nacho Cheese Doritoes
 
Brown your hamburger and add seasonings, while it simmers shred lettuce, crumble a handful of Doritoes (we have used plain Tortilla  chips instead) and add cheese to your liking.  Mix mayo and taco sauce or a couple spoonfuls of salsa.  Add seasoned hamburger to the salad mixture, pour mayo mix over the top and stir it all together.  Done. 
 
We eat ours by scooping it up with chips.  Yummy!  Back in our college days it was served in a taco salad shell (you can find them at the store with all the other Mexican food supplies).
 
As you have probably noticed there are no measurements, I just throw stuff together.  No recipe I ever make is the same twice, drives my husband crazy.  I'd guestimate about 1/4 cup of Mayo.  I used about 1/2 a head of Romaine lettuce last night for the two of us.
 
We are pretty picky eaters around here so no added extras but there is so much you can do with this recipe to make it your own.  So Good!


Tuesday, April 14, 2015

Sock Fun


Found these projects on Pinterest and completely fell in love.  There's tons more if you're interested in making little stuffed bears or animals.  Do a quick search for "Sock DIY" and you'll find lots of great stuff.  Here's a few of my favorites to get you started:

Love this idea, two gifts in one.
http://www.ohcrafts.net/gifts-wrapping-a-wine-bottle-with-socks.php
Who doesn't need a sock snake, he's adorable!
Cute as can be.
http://blogs.hogarutil.com/2014/01/recicla-tus-viejos-calcetines-y-conviertelos-en-una-serpiente-de-peluche/

 
We use something along these line around here all the time for sore shoulders and funky necks.
http://satsumadesigns.com/naturalmakermom/make-a-3-heat-pad-in-10-minutes-for-maximum-holiday-stress-relief/

 
I have a little bit of a glove fetish, I can't pass up a cute pair of gloves.
http://savedbylovecreations.com/2013/02/old-socks-to-fingerless-gloves.html
Lots of ideas available for cup cozies as well.  Wow!
http://www.thatswhatchesaid.net/2011/coffee-cozies


Cute, there's socks for any holiday or year round use.  Great idea.
http://wipkits.blogspot.com/2010/12/sock-wreaths.html


How cute is that!
http://www.neatologie.com/make-cute-sock-monkey/

 
Lots of these ideas could easily be tweaked to make what would be useful for your purposes.  Such as the sock snake could be converted into draft dodgers for under doors.  Cup cozies could become decorative boot socks.  Do you have a collection of unmatched socks collecting dust that could be put to good use?  I sure do, I only wish mine were cute little girl socks.  I have a houseful of boys, my selection is limited to white tube socks and black/brown dress socks.  Pretty boring around here.

Have you made any cute sock crafts?  Do share, we'd love to see what you've done.

Sunday, April 12, 2015

Quick Trip to St. Louis Art Museum- Part 2


My son and I took a quick trip to the St. Louis Art Museum and boy, was he on a mission.  That's the quickest I've ever walked through a museum.  I really want to go back when I have more time to actually admire and enjoy the artwork. 
 
Caleb needed to pick a piece of artwork to write a paper on and he wasn't interested in spending any more time at the museum than was absolutely necessary.  As we walked through the first huge room of artwork he just aimless wandered muttering, "when I see it, I'll know it".  Well, unlike me where many things jumped out and grabbed my attention, he only found two that entertained him in any way.  The first one I shared in Part 1 and the other, well, it also caught my eye so you'll see it in just a minute.  
 
This piece to the right is in the main entrance area, interesting.  I told him it reminded me of a robot and he thought I was crazy, all in the eyes of the beholder right!
 
 
 We quickly walked through the pottery and furniture sections.  Some really beautiful stuff.  This piece caught my eye.  How intricately made, amazing!


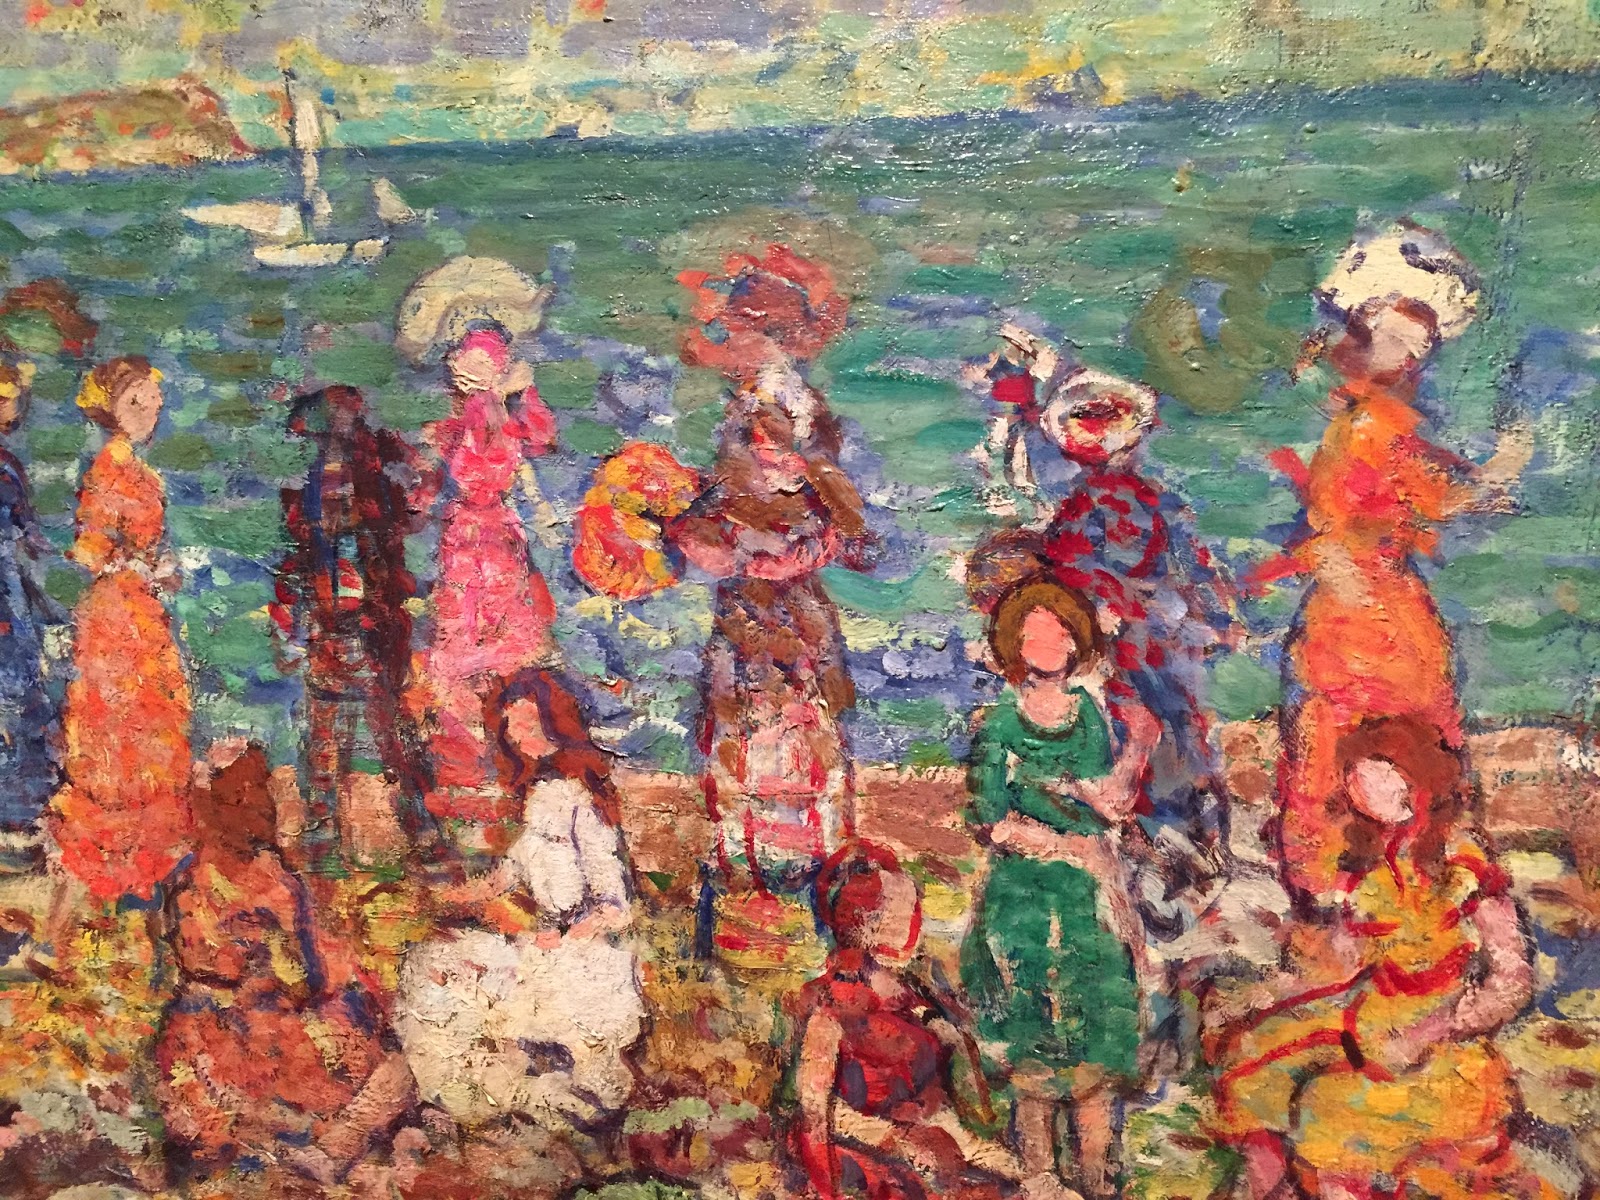
 Again, I wish I knew more about Art but this style is my favorite.  I love how its not a photograph, not a perfect portrayal but kind of "muddied".  Is that Impressionism?  I have no idea but it's one of my favorite styles of art. 


This one drew me in as well.  I imagine a walk through the mountains, the breeze blowing through my hair and a campsite next to a lake.  The colors are magnificent.  They aren't quite right, if that makes any sense.  They don't match reality, or the reality I've seen and I really like that.  


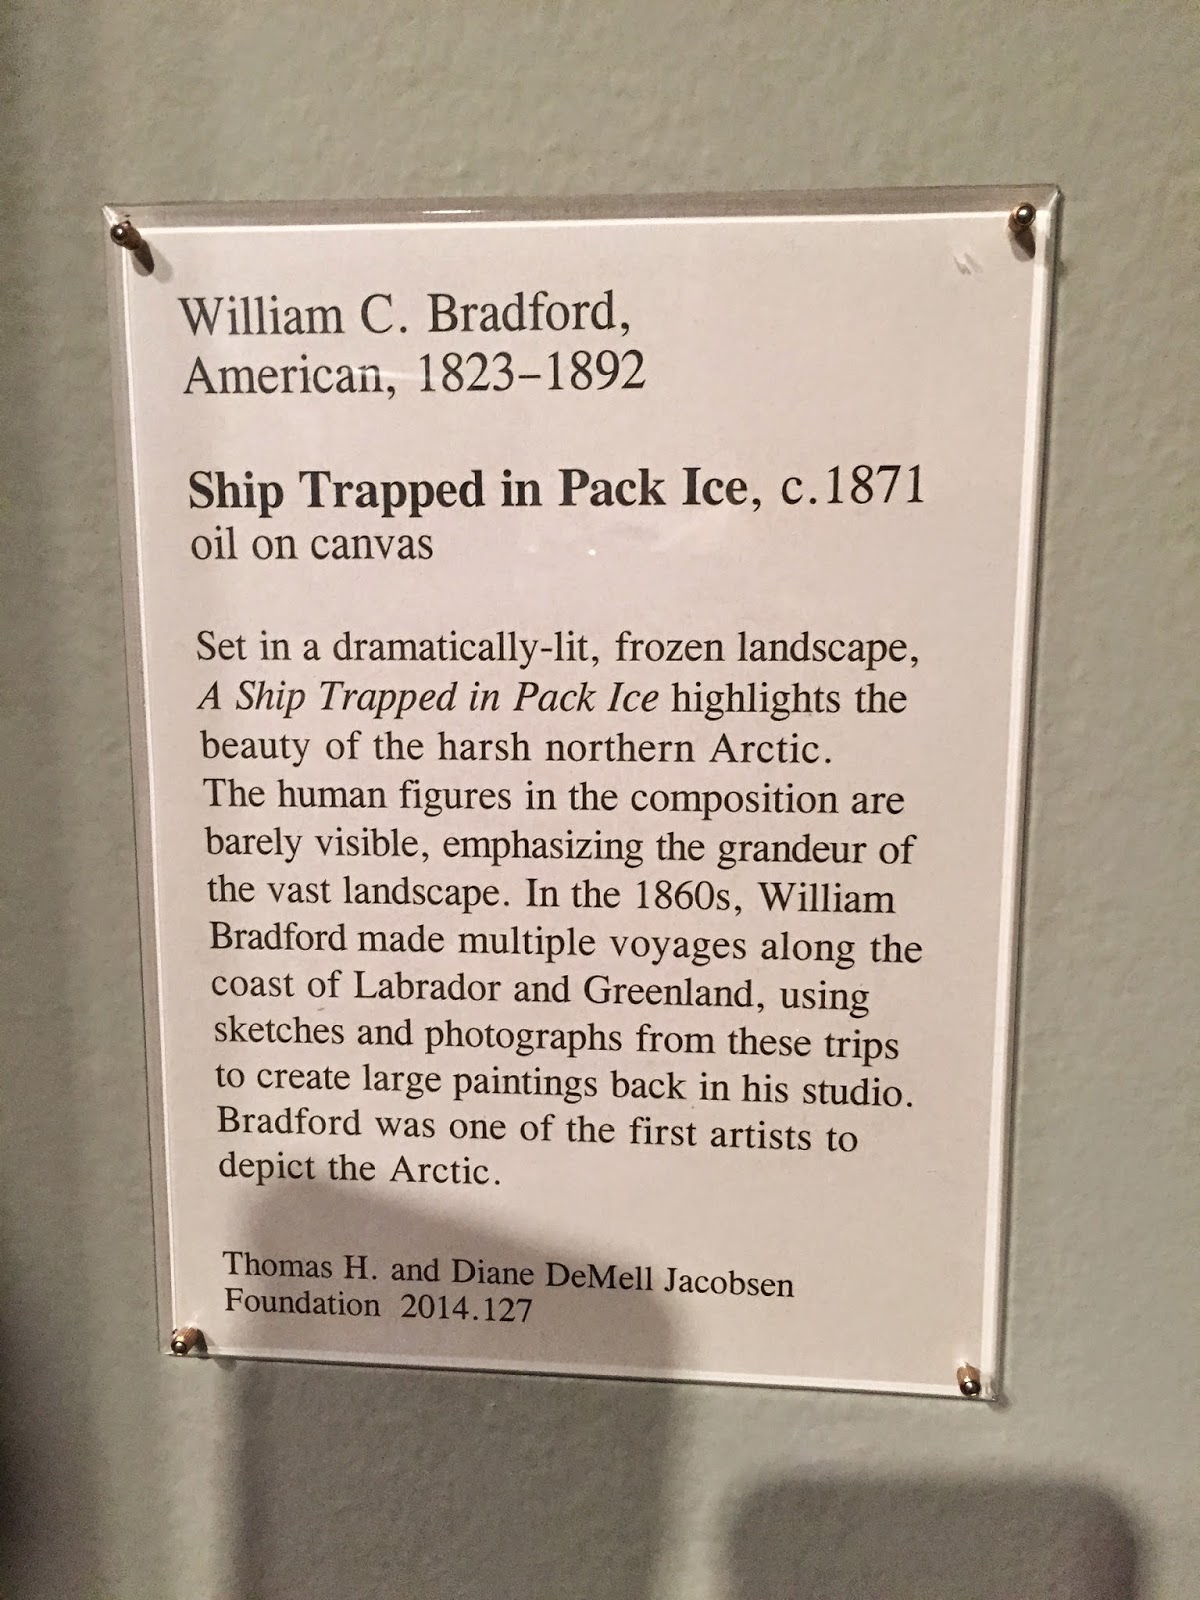
This is the second piece that drew Caleb's attention.  It really is a magnificent piece of work, and huge!  The colors are wonderful and the ice is so realistic, how in the world do they do that?  It is so life-like, amazing. 


This is another style that I love.  Again, I need an Art Class, I have no idea what style it is but I really love it.  I have an old book of my grandmother's that has some artwork in it that really reminds me of this piece and I'm always shocked by how beautiful the colors are, so vibrant.


This waterfall is interesting to me as well, love it!
 
 
I really like this one too.  It's interesting how the overall picture seems dark and quite dreary to me at first glance.  I almost walked on by.  Then, I came a little closer and took it all in.  Pretty interesting, seems like with each step closer something different popped out at me.  For instance, do you see the lake in this picture?  I didn't?  What about the next couple pictures?  See it now?  That is very cool to me.  What about the rainbow?  The waterfall spray?  The bald eagle?  Keep looking.  I really love how this grew a new life with each step closer. 


As we were leaving I caught a glimpse of this tree through the windows.  Wow!  It's a sculpture of a shiny metal tree.  Really great!  The picture doesn't do it justice!  Wish we had more time to walk around.
 
 My crazy boy needed proof that he actually went to the museum. 
 
Even short and sweet it was a great trip.  I'd really like to go back when I have more time but who knows when that's going to happen.  Have you been to any museums lately?  Do Tell.

Saturday, April 11, 2015

My Landscaping Adventures- 8

This is my attempt to chronicle the progress around the yard dealing with our many landscaping adventures.  Here are the links to previous articles in case you're interested:
 
My Landscaping Adventures  Getting started in the front yard and an island of rock
My Landscaping Adventures- 2 The island border and a preview of the back patios
My Landscaping Adventures- 3 Back lower patio, firepit and cantilevered staircase
My Landscaping Adventures- 4 Upper Patio, deck and the beginning of backyard plantings
My Landscaping Adventures- 5 Photos of the planting areas we've talked about so far and the beginning of the large bed out by the road
My Landscaping Adventures- 6 A look at the large flowerbed I've added out front, from a few placed rocks to planted berms and the start of a watering system.
My Landscaping Adventures- 7 Vertical Concrete Retaining wall, firepit and pump house. 
 
Today is a concrete walkway leading from the circle driveway around to the back patio.  This project took most of a season, long 3-stage process but we love how it turned out.  It also gets me a new flower bed to the left of the walkway towards the rock wall, who wouldn't love that!

First thing was to dig the footings, don't want all our hard work to go sliding into the lake someday.  The boys dug about half and then hubby took over and finished it up.

Here the footings are poured with rebar extending to attach to the curb and the framing of the curb has begun.

The outer framing is done, the wall portion anyhow.  It looks way too tall.  I questioned that but there's no way around it.  The slope from the drive to the patio is quite large.  To keep an even, comfortable slope with no steps that's the way it had to be.  Our goal is for it to be wheel chair accessible.  Once the rose bushes grow up it'll be disguised and hardly noticable.   You can also see the beginning of my next wall in the background.
The picture below shows our attempt at adding some wood texture to the concrete as well.  We used the house siding (it's concrete board) and then hubby added some small pieces of melamine (the tag says eucaboard) to add spacing between them.  This is a trial and error type thing.  We've not done this before.  We could have lots of problems when it comes time to remove the framing, we've wiped all forming down with form oil in the hopes that'll help us out.  We shall see! 
 

This is pour day.  Between the curbs will be filled with dirt/rock, I don't remember what he said for sure. 
We did have some problems with bulging, my son put some of this in and the stakes are not in anything that's supporting them (he put them in above the seawall where there's minimal dirt vs. a little bit further in where they'd actually catch something that'd give some substantial support).  What's that old saying, "if you want smething done right you need to just do it yourself", or at least monitor their work and make sure it's done right.  It won't be noticable when all is said and done but J was annoyed that it's not "perfect".
These little pieces of rebar sink in nearly 10" and stick up a couple so that they'll enbed in the planks that make up the actual walking surface.  The planks will hang over the edge a couple inches on each side.  On the straightaway (the part pictured) they'll be 12" wide by 3.5" thick with spacing between. 
2 Stages down (footing and curb), Stage 3, Planks. We poured it in two pieces.  This was the first half.  You can see the curb and rock underneath and then it was framed out so that the planks will hang over the edge of the curb. 
 There are two pieces of rebar in each plank that are tied to a u-shaped piece sticking up from the curb, it's not going anywhere.  You can see our homemade form liners on the edge.  We needed 86 pieces in order to pour half the planks.  We used a stamp we had (a tree slice) with leftover concrete from the curb pour as a template.   Lots of prep work involved but pretty neat stuff (some type of urethane liquid rubber, mix two parts together and smooth it into your template.  Sets up overnight, we had to do it multiple times).


 This is the first pour, after an initial "hiccup" all went smoothly!


 Stamping. 

Our initial plan was to let the wood separators rot out.  We really wanted the look of a national park where the wood walkways  have spacing between them.  Now that's it's done Jason's wheels are spinning trying to come up with a way to remove the wood.  He wants it outta there!   


I cannot even tell you how many times I heard, "there's gotta be an easier way to do this, I just don't know what it is!"

All he could come up with was to chainsaw out the center of the spacer (1x4) and then use the concrete saw to slice it even further and then pull the pieces out.  Worked like a charm, backbreaking though, and time consuming, he was determined to get the wood out!


Done!
 
   It took a lot longer than we expected.  By the end of this project we were both really feeling our age.  Old and tired! 
 
Next time, the completion of my second retaining wall and more flowers.  I do believe we've worked our way through all our many projects to date.  Hoping to start some new ones soon.
 

Friday, April 10, 2015

Quick Trip to St. Louis Art Museum


I always forget how beautiful driving through Forest Park can be.  Hoping to make it to "The Muny" this year for a show and I haven't been to the zoo in years.  All on my summer to-do list.
This is the Art Museum.  Beautiful building and if you stand in front of the building and look across the street the following pictures are what you'll see, what an amazing view!


This is what you'll see upon entering the building into a humongous central entry/receiving room with three large archways in the middle on either side with smaller archways on the ends.  The pictures don't do it justice.  Immediately upon walking in I was awe-struck and silenced by it's majesty. 
 
My son was on a mission so this was an incredibly quick trip.  I didn't even have time to read signs and look at everything.  I snapped some pictures of the things that grabbed me, for him, he took two pictures.  Can you believe that? 
 
I've only been to the museum one other time and I remember these wonderful paintings by Gerhard Richter.  I am no Art Connoisseur, I love it but have no idea about technique, history, what style, etc.  I simply gravitate towards certain pieces that draw me in, like these.  They are outstanding!


Another piece I really love is this one by Susan Rothenberg, so beautiful.  Someday I'd like to learn more about Art and maybe then I could properly describe it but for now, I love how it feels so "surreal", "muddied",  gives an impression of what it should be but somewhat hidden in how it's portrayed.  That is a style that I just love and this piece is one of my favorites!


I also tend to gravitate towards pieces such as this.  Why?  I have no idea but I find them interesting.
 
 
Sometimes I tend to forget how incredibly talented people of old were.  At first, from a distance this looked like a tapestry, it's tiny little mosaics.  Wow!  Makes me think of all the amazing Architecture from early days.  How amazing those people were.  I can't figure it out now and they, with no modern tools and heavy machinery managed to build such amazing things.


This is one of the little rooms at the museum.  Gorgeous!
 
 
One of 2 pieces my son took a picture of and is considering writing his paper about.  A man wrestling a python. 
 
 
I also tend to gravitate towards Oriental Artwork.  Something about it pulls me in.  So beautiful.


I still have more but I'm going to break it up into two parts, coming soon the 2nd piece my son thought enough of to take a picture and consider using for his project and a handful of other gorgeous pieces that drew me in.  Some really great stuff.
 
If you're ever in the St. Louis area make sure you visit Forest Park.  Lots to do and much of it is FREE!.  Check out the Zoo, free admission to much of it and if you time it right (earlier the better) you can park for free and gain admission into the Children's museum for free (check out their website for details).  The Art Museum is right up the hill from the zoo, free admission and parking.  If you meander around Forest Park eventually you'll find your way to The Science Center, lots of free stuff as well as paid portions.  Lots to see and do.  If you time your visit right you could also see a show at The Muny, (there is a limited number of free seats here as well, first come first serve).
 
Also, don't leave town without heading to City Museum.  This is by far one of my favorites (nothing is free here).  If you have kids its well worth it.  Full of art installations and found object art, huge ballpit and climbing areas for the kiddos (outside), a small aquarium, underground cave-type systems, my boys absolutely love this place and if you like recycled art or inventive uses of found objects, this is the place for you.  
 
Lastly, another of my boy's favorites (when they were younger anyhow) is The Magic House.   Just a few of the many things to do here in St. Louis, MO. 
 
Stay tuned for Part 2 of our Art Museum trip.


Related Posts Plugin for WordPress, Blogger...